
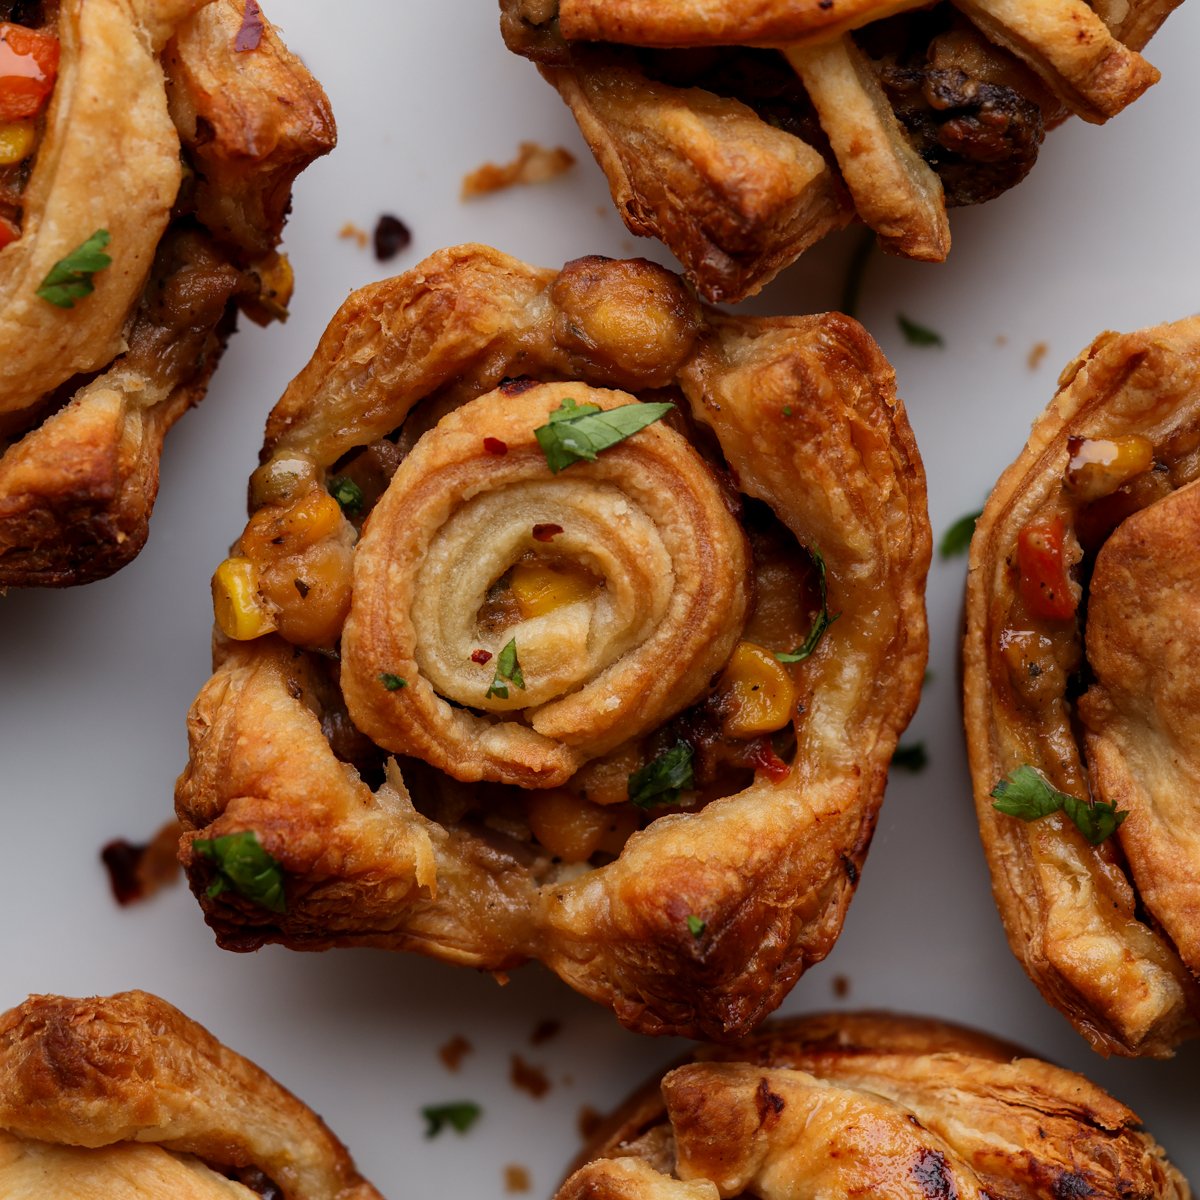
These mini pot pies with a filling inspired by Tuscan chicken are a super delicious entree! You bake these cozy, savory pot pies in a muffin tin, and they are as tasty as they are adorable. (Options for gluten-free, soy-free, and nut-free)

These Tuscan mini pot pies are a fantastic addition to your holiday spread! I make this amazingly delicious pot pie filling, which I have changed from the classic to use the flavors of Tuscan chicken like my Tuscan white beans. The filling has this creamy sauce with sun-dried tomatoes and lots of Italian herbs paired with vegetables, chickpeas, and mushrooms.
To make the individual pot pies even easier, we use puff pastry in a muffin tin for the crust, so no need to make a whole pie crust from scratch! Simply cut and shape the puff pastry to fill the muffin tin or small ramekins and to top the pies. If you don’t want to use a muffin tin, you can prepare these in oven-safe ramekins instead.
Each of the pot pies comes out crispy, golden, and flaky with this creamy, delicious, veggie-packed filling, and they’re just fantastic.

They’re a great way to serve a pot pie without making too much of a mess. They also take less time to make, if you make them in a muffin tin, because you just put that whole muffin pan to bake instead of dealing with individual ramekins.
Mini pot pies are perfect for your holiday spread. You can easily judge how many you need to make, since a portion is just one or two of them, depending on the appetizers, sides, and desserts on the rest of your spread. If you want larger portions, you can also use a Texas muffin tin to make slightly larger mini pies, or just make one large pot pie!
These are super flexible, super versatile and are absolutely delicious. You can mix up the filling, using cannellini beans, tofu, seitan, soy curls, or vegan chicken as the filling instead of the chickpeas.
While you are here, get a great deal on my instant pot book’s kindle version for a limited time! It’s a great digital gift!

Why You’ll Love Mini Pot Pies
- single serving comfort food that’s perfect for the holidays
- creamy filling inspired by Tuscan chicken with toothsome mushrooms and chickpeas and umami sun-dried tomatoes
- flaky, crisp puff pastry crust means no kneading or mixing a dough
- easily made gluten-free, soy-free, and nut-free

For the Pot Pie Filling
- 2 teaspoons oil
- 4 cloves garlic, finely chopped
- 1/2 cup chopped onion
- 1/2 cup chopped celery
- 2 ounces mushrooms, or more, if you love mushrooms. Quarter them, if they’re small, or slice if they are larger.
- 1 tablespoon balsamic vinegar
- 1 cup cooked chickpeas, or white beans or chopped tofu
- 1 1/2 to 2 cups chopped vegetables, a mix of carrots, greens beans, peas, potato etc , , I use frozen vegetables.
- 2 bay leaves
- 1/2 to 1 teaspoon dried rosemary, or thyme or use both(1/2 tsp each)
- 1 teaspoon Italian seasoning
- 1/2 teaspoon black pepper
- 1/2 teaspoon onion powder
- 1/4 cup chopped sun-dried tomato
- 1/2 teaspoon salt
Prevent your screen from going dark
Make the pot pie filling.
-
Heat a deep skillet or a saucepan over medium heat. Add the oil, and once the oil is hot, add the garlic, and cook for 15 to 20 seconds. Then, add in the onion and celery and a good pinch of salt and cook for 3 minutes, or until the onions are just starting to turn translucent. Mix in the mushrooms and balsamic vinegar, and let the mushrooms cook for 3 to 5 minutes.
-
Meanwhile, make your cashew cream mixture by adding the drained cashews, water, miso, and flour into a blender and blending until completely smooth. I usually blend it for a minute, then let it sit for 4 to 5 minutes and then blend again for 30 seconds, and repeat 1-2 times until the mixture is smooth. Set this aside for now.
-
Once the mushrooms are starting to turn slightly golden on some edges, stir in the chickpeas, vegetables, herbs, spices, sun-dried tomato, and salt. Cook this for 2 minutes or so, then mix in your cashew cream mixture, and bring it to a good boil. Stir occasionally, so that the mixture doesn’t stick to the bottom of the pan. Once it is boiling, reduce the heat to medium-low, and continue to cook this for 5 minutes or longer, until the vegetables are cooked to about al dente, then switch off the heat. At this point, Remove your puff pastry from the freezer, because it needs to thaw for 15 to 20 minutes. The filling will have thickened a bit, let it cool on the counter for 10 minutes, then put it in the fridge for at least 15 minutes, so it thickens more. This will make it easier to spoon into your muffin tins and prevent the heat from making the puff pastry soggy.
Meanwhile, prepare the puff pastry.
-
Preheat the oven to 400° F (205° C).
-
Once the puff pastry is pliable, use a little bit of flour to roll the puff pastry sheet out on your counter to about 2” larger than the original size of the sheet. Then, slice it up into 6 equal pieces. Use a pizza cutter to slice off some of the edges of each of the cut portions, so that they’re kind of a square. Don’t throw out the edges that you cut off, because we’re going to use those to top the pot pies. Repeat with the other puff pastry sheet.
-
Prep your muffin tin or ramekins by greasing them really well or line with parchment. (Grease all of the insides as well as the edges, so the pot pie can easily be removed later). Then, place each of your puff pastry squares in the muffin tin or the ramekin.
-
Remove your cooled filling from the fridge, and put good portions of the filling inside each of the puff pastry squares in the muffin tin. Then, on the top, use the remaining strips of puff pastry to make any kind of designs you like. I like to make a lattice design or circles with the strips, but you can get creative and make other designs, like flowers or hearts on top. Brush the puff pastry edges and tops with a little bit of oil, then bake for 25 to 30 minutes. Check them at the 25-minute mark to see if they are already nicely golden on most of the edges. If they aren’t yet, then rotate the tray and continue to bake for another 3 to 5 minutes.
-
Then, remove the pot pies from the oven, and let cool for 5 minutes or so, and then pop them out of the muffin tin or your ramekins, garnish with some chopped herbs, and serve immediately. The filling will be nice and bubbly and creamy, and the pot pies will be golden, crispy, and flaky.
To make these gluten-free, use a gluten-free flour blend instead of the all-purpose flour in the pot pie filling, and use a gluten-free pie crust, like the one in my gluten-free Wellington. If you use a pie crust, bake them for 15 to 20 minutes before adding the filling, then fill and bake again.
For soy-free, use chickpea miso and make sure that your puff pastry is soy-free.
To make this nut-free, use 2 tablespoons hemp seeds and 1/4 cup of tofu instead of the cashews to make the cream.
Calories: 300kcal, Carbohydrates: 30g, Protein: 7g, Fat: 18g, Saturated Fat: 4g, Polyunsaturated Fat: 3g, Monounsaturated Fat: 10g, Sodium: 237mg, Potassium: 256mg, Fiber: 3g, Sugar: 3g, Vitamin A: 1203IU, Vitamin C: 5mg, Calcium: 30mg,